A practical approach for anyone who wants to take great pictures of musical instruments.
By Leo Lospennato from Fellowship Of European Luthiers
Amateur and professional luthiers alike face a dilemma when it comes to taking pictures of their new creations:
Option 1: Spending a few hundred euros taking our instruments to a professional photographer. Option 2: Take the pictures ourselves. This article is aimed at helping us with the first steps into product photography — more specifically, photos of guitars.
What do we need?
First of all, having a good camera will help. Do not dream of obtaining a remotely acceptable photo with your smartphone or with a 1 megapixel camera. If you don’t happen to own a good camera (of at least a semi-pro quality) you can borrow one from a friend, or maybe rent one.
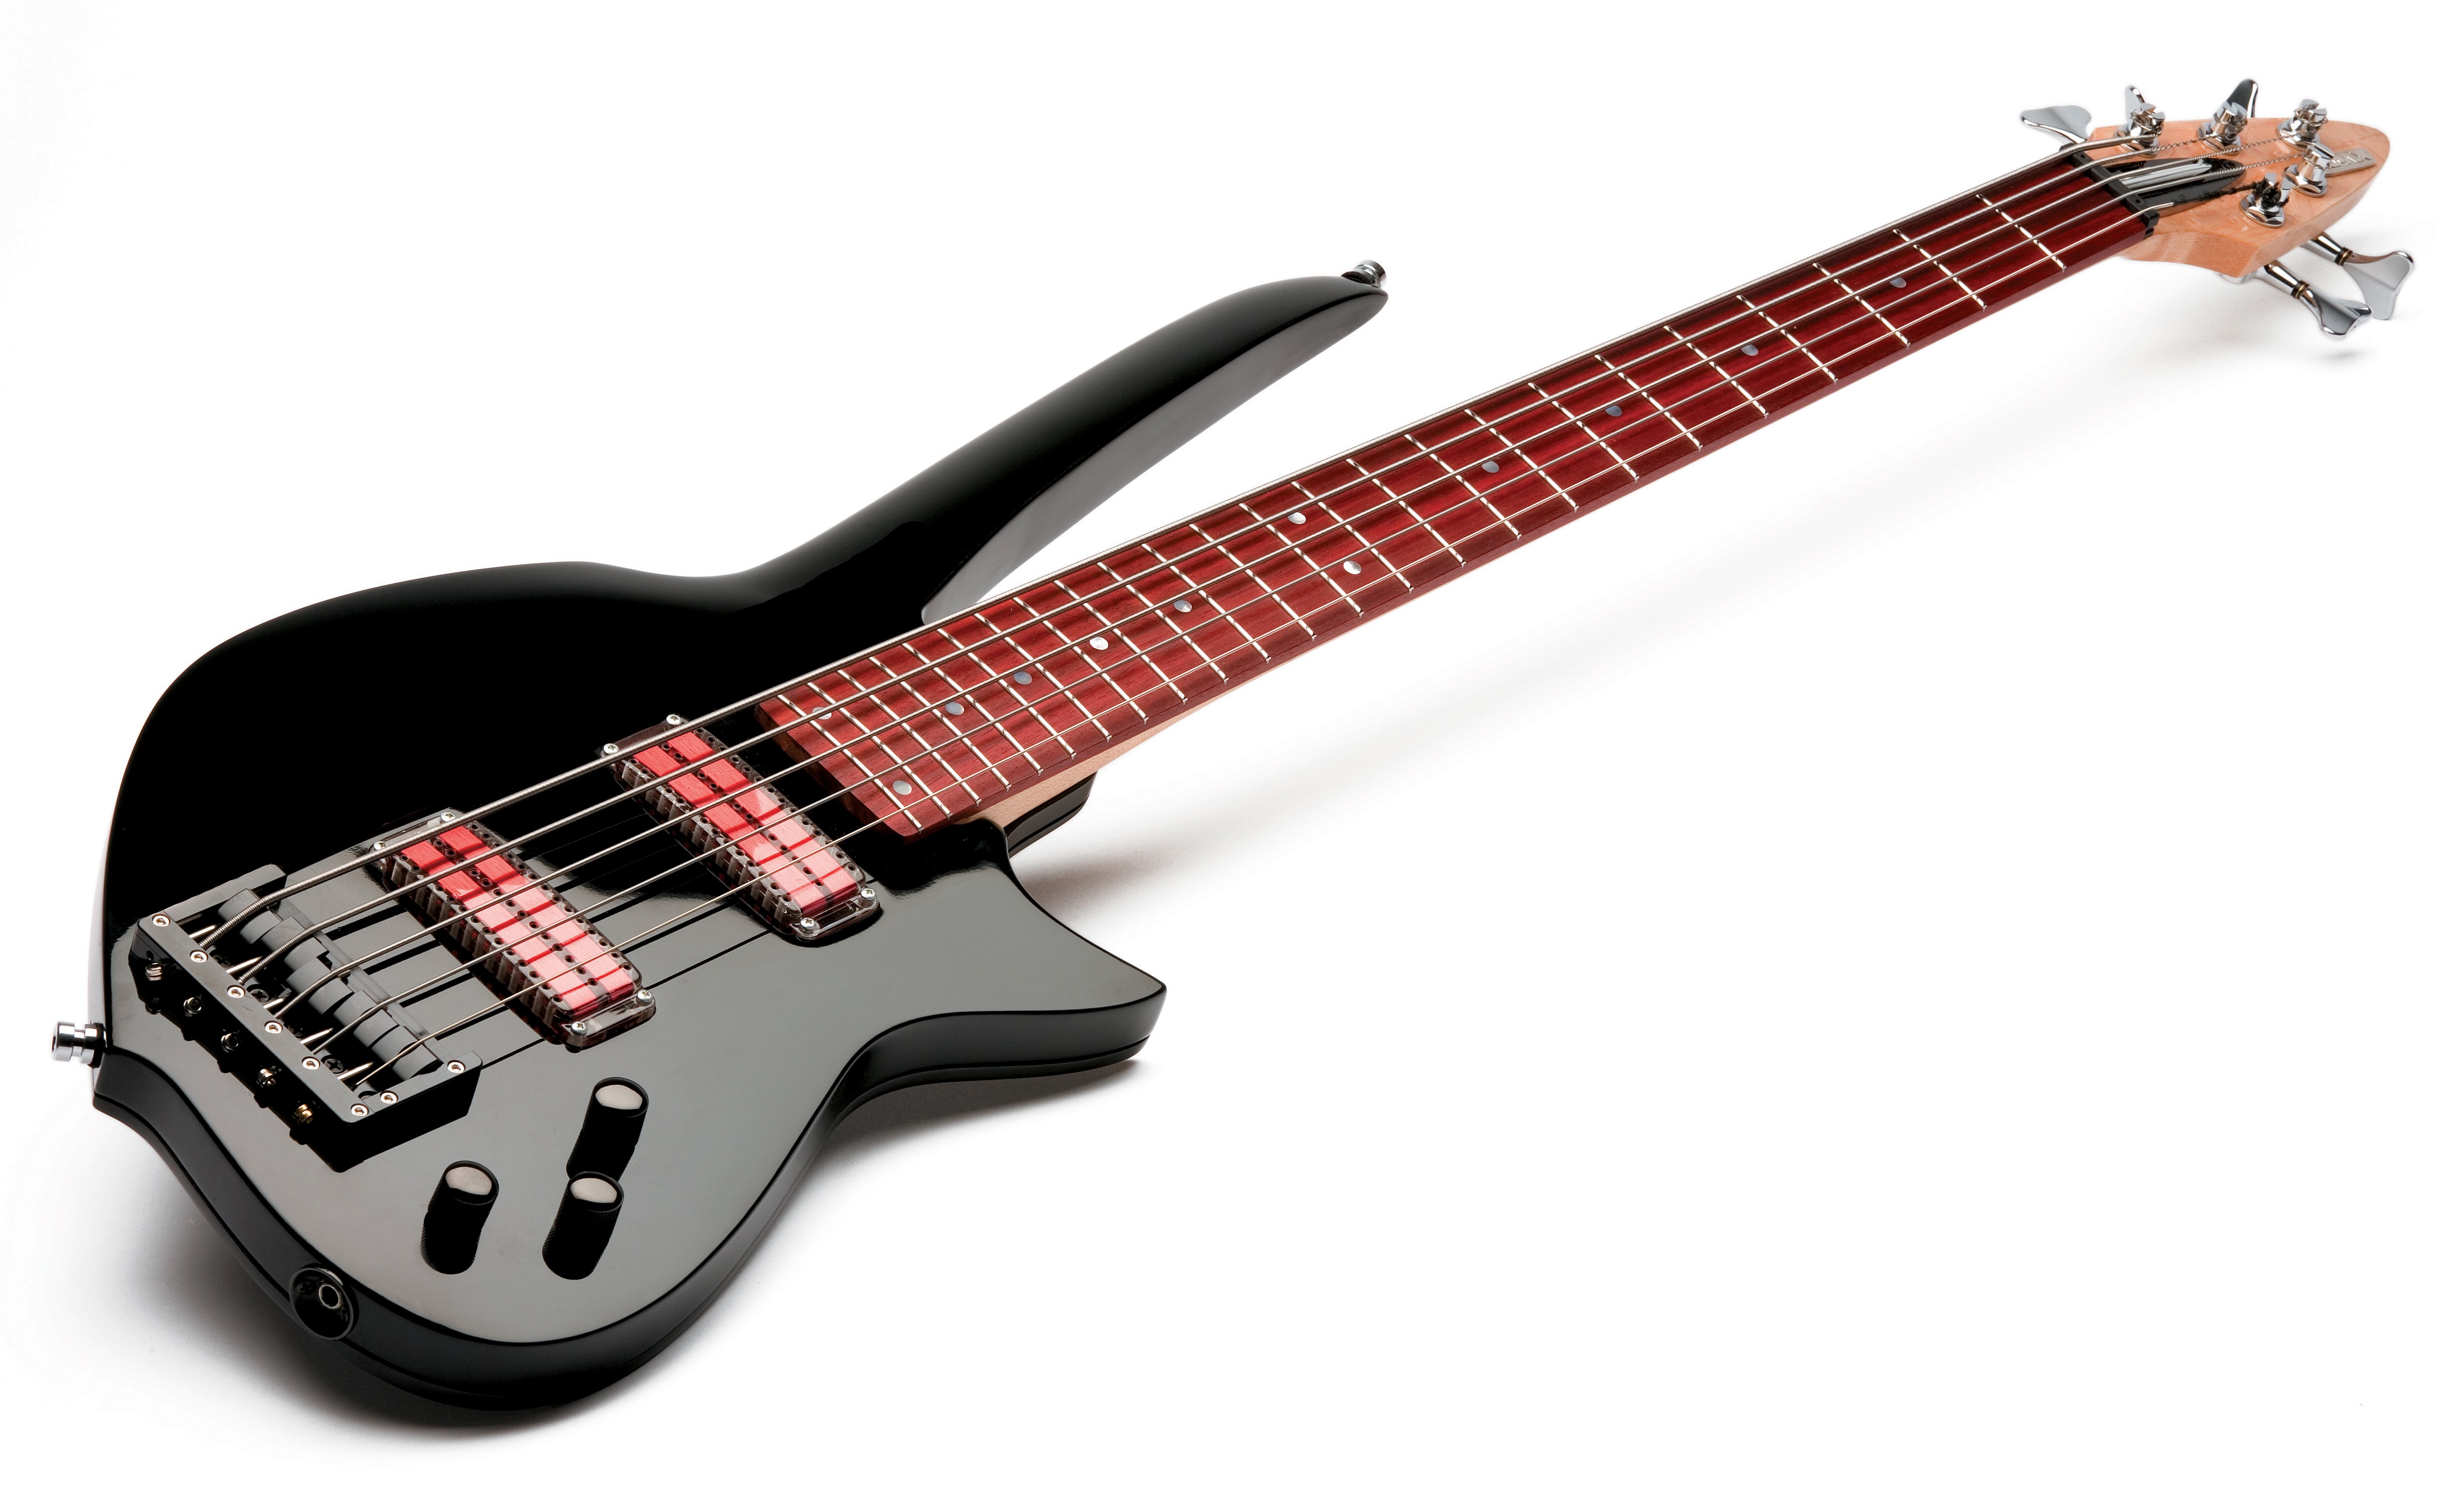
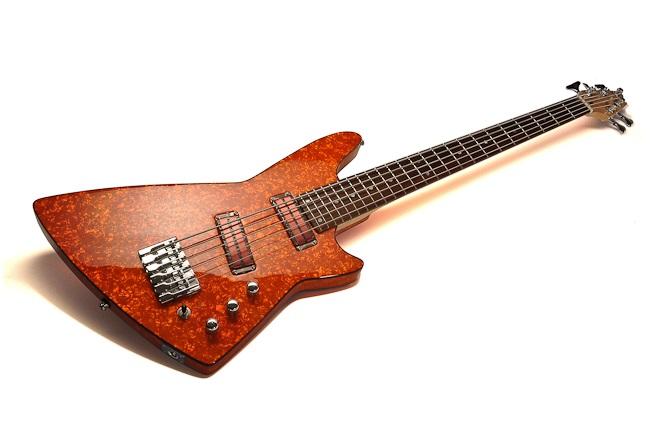
Second, we need a clear idea of the quality you want to achieve. Compare the following pictures. This was my first attempt — wrong camera settings, wrong studio setting, wrong lighting, wrongbackground, no retouch.

Now look at the next picture of one of my basses taken by Dieter Stork (a professional photographer who specializes in electric guitars) for a test of an instrument on Gitarre & Bass, Germany’s most important magazine on the subject:

Photo Copyright © by Dieter Stork
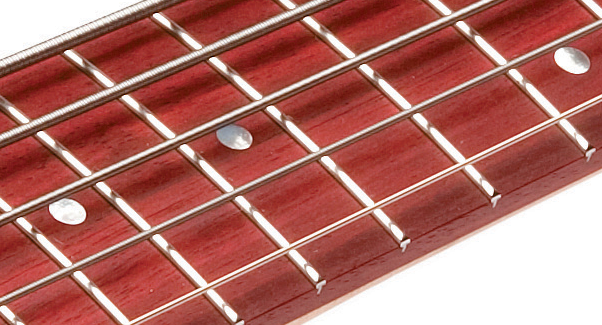
I knew that I would probably never reach that level of quality, but that picture did set the benchmark for me: I wanted to make something at least approximate to that astonishing clarity and level of detail. If you look at the picture in full resolution, you can magnify the frets and actually see things reflected on them!

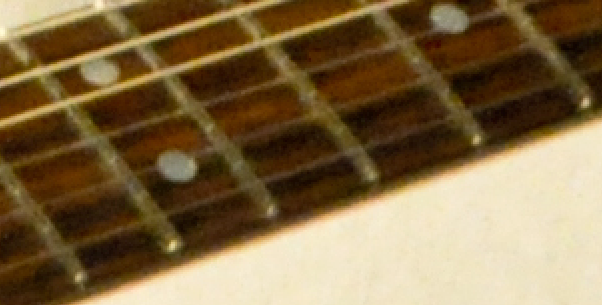
In my yucky first picture, the frets themselves were barely defined by some blurry pixels:

The camera’s resolution was only one variable contributing to the disaster: there were a lot of things I was leaving out.
Third, decide the individual takes you want. I needed the following:
– A main picture of the full instrument (just as in the pictures above).
– A frontal picture of the guitar’s body, in playing position (that is, the guitar inclined about 20°, as it would look hanging around a player’s shoulders).
– A picture of the back of the body.
– Three additional pictures of particular details (pickups, nuts, etc.).
Preparation
1) Quick setup of the instrument. A good picture would tempt the viewer to reach into their computer screen and grab the instrument and play something, so at least perform a quick setup—a “cosmetic” one. At this point it just has to look good; the real setup can be taken care of later on.
2) Clean the instrument. You can always use Photoshop to eliminate fingerprints, dust specks, and dirty spots, but I have found that a microfiber cloth works much better than software and saves you a lot of time. Do not use paper tissues or fabrics that leave particles of the fibers on the instrument. The static electricity generated by the friction of the cloth will attract them like a magnet.
Regarding the finish itself, you can use wax, swirl removers, or other product of your choice – I recommend those produced by 3M. You find them in stores specializing in car accessories, or just order them online.
3) Plan the session. Work in a room big enough to contain the elements you are going to use, allowing you to move around without stepping on things. Depending on the kind of lights you are using, the temperature can go up very quickly, so be sure that the place is properly ventilated. In my case, my living room (4 x 6 meters, or 12 x 18 feet) would do.
Also, having a helping hand is important, perhaps someone to hold the instrument in position for particular pictures or to help you move things around. A person with experience in product photography will add a valuable collaboration. But this is valid as long as you can work together effectively. Having someone looking over your shoulder, making suggestions, or correcting you all the time can be pretty annoying. If that is the case, you are better off working alone. Consider the difficulties and mistakes as part of a learning curve.
4) Safety. Please pay attention to this important advice:
Do not allow children in the room. It is going to be full of cables, delicate equipment (tripods are not as stable as they look), and things running on electricity.
Talking about electric things, I use 500 watt halogen lights. They are very, very hot. They can ignite or melt all kind of plastics, papers, fabrics, and other materials placed close enough (guitar finishes too). The lights must absolutely be used mounted on their corresponding stand, never directly leaning on top of other things like tables, books, etc.
Have a fire extinguisher at hand — one rated for electrical fires.
Be sure that you will work in a place with a proper electrical installation, with thermal switches, circuit breakers, etc.
Camera settings
There are many correct ways of taking good pictures; this is only a practical one, not necessarily the absolute best. Let’s start with setting up the camera correctly.
1)Set the priority mode to “Aperture.” In most cameras, this is indicated in a wheel (commonly on the left side of the camera) with an “A” or with an “Av” sign.
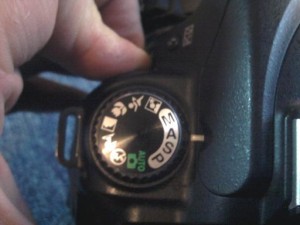
“Aperture” means that the camera will give priority to something called depth of field and not to the shutter’s speed (explained soon).
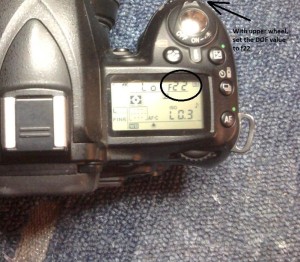
2) Set a high depth of field. Set the depth of field (DOF from now on) to “f16,” or even higher, like “f22.” The higher the “f” number, the deeper DOF the pictures will have. A high “f” number means more things will come into focus, not only the central part of the picture.
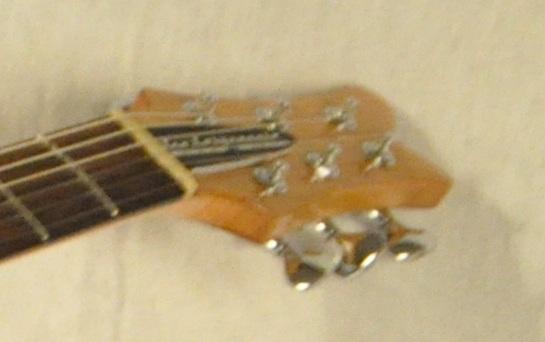
With a DOF = f8 the bridge looks in focus… 
…but the headstock (located in the periphery of the composition) looks totally blurred.
Less DOF =lLower “f” number = less things into focus = only the central detail looks sharp = the farther the other details are from the primary subject of the photo, the more blurred they come up.
3) Set the ISO to 100. The “ISO” (formerly known as “ASA ”) tells you about the camera’s degree of sensitivity to light. In the old days of photography on film, a 100 ISOs film would take clear and detailed pictures, but it needed better lighting conditions. If you wanted to take photos in a darker environment (an indoor party at night, for example) you would choose a 400 ISOs film. To photograph a night starry sky, for example (incredibly low amounts of light), you would use a film with an ISO in the thousands. High ISO films would work much better in the dark, but the “grain” of the picture would be much coarser: the higher sensitivity of the film was achieved by means of larger photo-reactive particles on it, implying a lower resolution. In modern digital cameras, something analogous happens. All you have to do is to set the ISOs to 100. In fact, some cameras have the chance of setting an even lower ISO. As seen in the picture, I set the ISO to something called “L 0.3,” the lowest available. The units are not expressed in ISO any longer because this setting is “artificial.” It is not native to the sensor (the “L 0.3” tag indicates that the low ISO is achieved by means of the camera’s firmware), but it should not produce a noticeable drop off in the picture’s quality – on the contrary, it should increase its quality.
4) Set the exposure to zero. “Overexposing” the picture (allowing more light to impact the light-sensitive surface) is a trick that might help in diffusing the details of a white background. Look at these examples:
The overexposure diffuminates the background (putting us closer to the results we were set out to produce), but it also sheds too much light on the instrument. Details on the guitar disappear, and the excess of clarity makes “the eyes hurt”. That has a deleterious effect, for instance, for chatoyancy — the optical reflectance effect seen in certain violin backs. My experience is it is better to shoot the pictures without overexposing them and use the software to correct the background later on, during the retouching phase.

Example of picture with no overexposure. The details of the white background are visible.
The same picture taken with an overexposure = +1.0. The background is less visible, but the wood figure is less striking.

With an overexposure = +2.0 the background is white (as we wanted), but the instrument looks too bright.
White balance. The camera will try to balance the colors in the picture to avoid extreme contrasts, causing the white background to look grayish. This can be corrected from the camera itself (which I didn’t try to do) or more simply, again, by using software later on (Lightroom or Photoshop), when the white balance can be set with just a couple of mouse clicks instead of navigating the menus of the camera.
Metering. Metering refers to the mode in which the camera measures the light in the scene in order to balance the light of the resulting picture in different ways. There are three modes of metering:
1) Spot metering, prioritizing the light on the very center of the picture (good a backlit subject against a sunset, for example).
2) Partial metering, prioritizing about 60 percent of the scene around the center (in order to counterbalance a strong back lighting, for example).
3) An “overall metering,” which senses the lighting conditions in the whole field of the picture. This last option is the one we need. So, you want to set your camera like this:
In the overall metering mode (also called “matrix” or “multi-zone” metering), the camera will take as reference the average lighting on the whole instrument. Of course, this is valid for the kind of whole instrument picture I am trying to make. If you want to “isolate” a particular detail (leaving the surroundings more dark), go ahead and try the other metering modes.

Resolution. This one is easy. You want, of course, the camera set to the highest resolution available. No matter how many megapixels it has, you want them all. Even if online pictures have a relatively low resolution (72 ppi [pixels per inch], a detail fine enough for most computer monitors), for printed media, a resolution of at least 300 ppi is necessary.
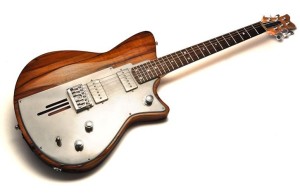
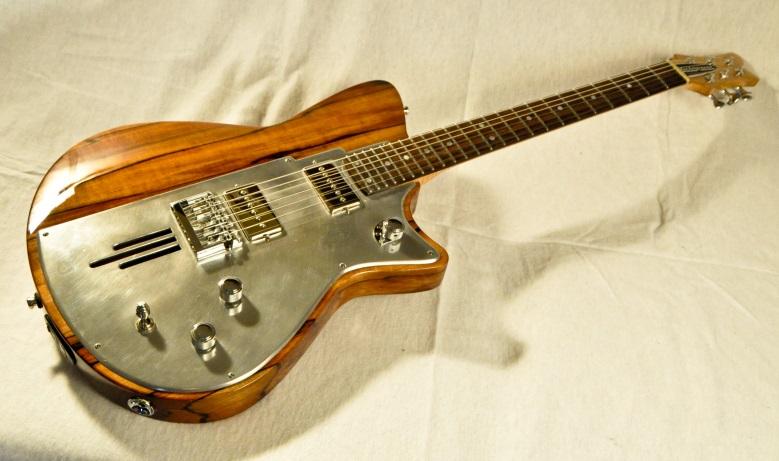
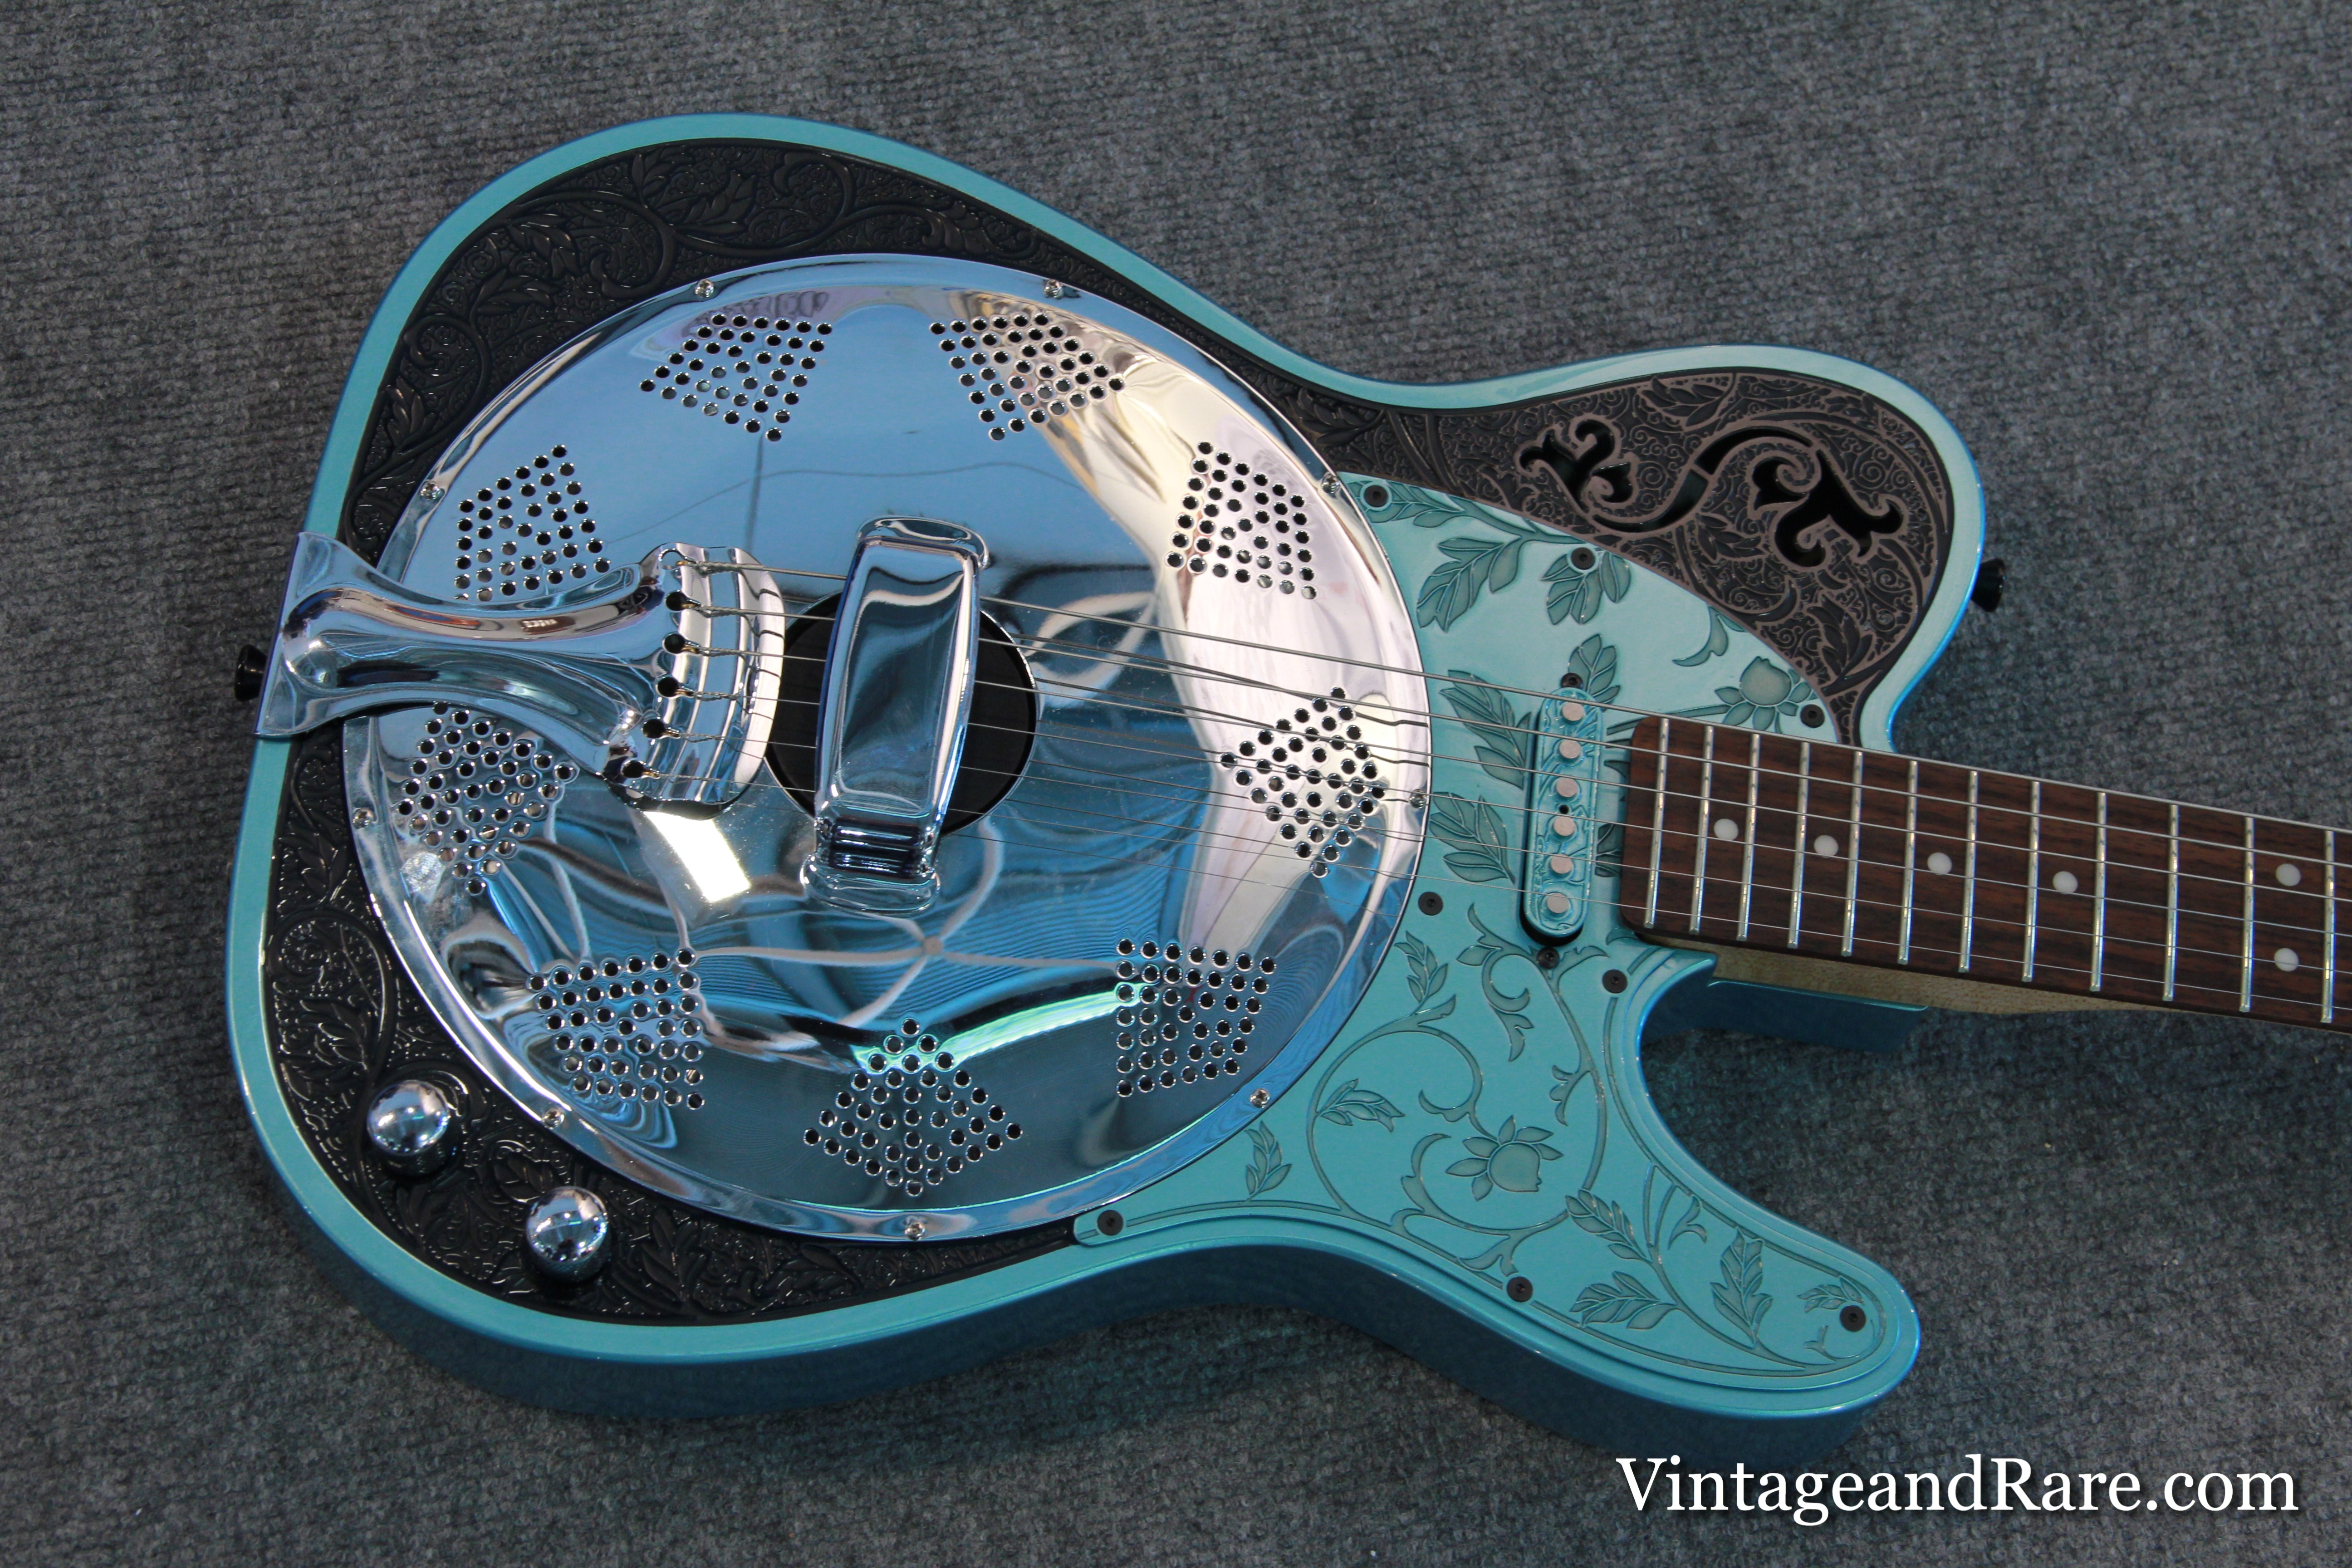
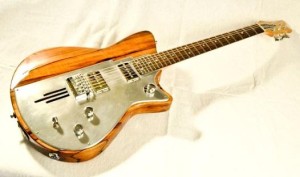
With a little practice we can approximate professional results, as shown in this picture; it was taken according to the instructions to be presented in this series of articles. The secret: A (reasonably) good camera, correct settings, the best possible lighting setup, a little help of retouching software and a nice dose of patience (photo by the author).
Shutter speed. The settings described above will give you the most clear, detailed picture. But there is a catch: the camera will require a relatively longer exposure time. The shutter (the device in the camera that regulates the amount of light that will impact the camera sensor) will have to stay open longer in order to allow enough light to pass. Why is this a catch? A longer exposure time means a higher risk of camera shake. With these settings, you get the higher detail but cannot shoot holding your camera in your hands. If you are really determined to make good pictures, you must use a tripod. You can get them very cheap on Amazon or eBay (believe it or not, I got mine — a cheap but decent tripod that gets the job done — for 12.90 euros).
After you get familiar how to make a good photos of your instruments now let’s see how to set up a home studio for very little money. Remember, I am not a professional photographer, just a luthier who wants to take good pictures of his instruments. So I am just sharing my experience — in this case, one that took place in my living room.
Photography is becoming an ever increasingly popular pastime. According to some sources (http://bit.ly/HhfAza) ten percent of all photographs ever have been taken during the last year alone. The Internet, cell phones with cameras, social networks all have made it easier to stay in touch but harder to stand out.
The world has indeed become a smaller, more crowded place. So, if we want to the pictures of our products to stand out and have an impact we need to make damn sure they are good. If we want to stand apart from our competition we better make sure they are as good, as cost effective and as professional as the can possibly be.
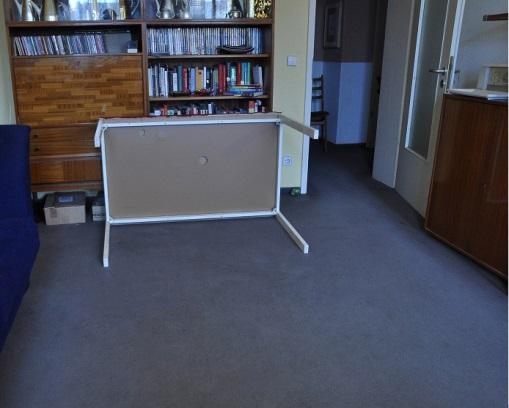
Speaking of my living room, this is how it looked before I started transforming it into a home studio — I took a table from my workshop and placed on its side:

I could have used the table to place the instruments on, but I decided to go for the floor so I could use the table’s legs as a supporting structure for the background and the lighting, as shown in the next picture.
Background
The first indication of an amateur product picture is the choice of background. The Internet is full of pictures of guitars just lying on a kitchen floor or on a sofa. A professional picture would surely be taken with a backdrop background. I think the best backdrops are the paper rolls like you find in all professional photo studios. But this is not the cheapest option. One alternative (which is the one I have used) is a cloth backdrop. However, the texture of the textile, the wrinkles, and its less-than-perfect white color means it needs to be edited using retouching software. However, even if the white cloth got photoshopped out in the end, it provided a good contrast to my guitars in order to work more accurately on the retouching later on.
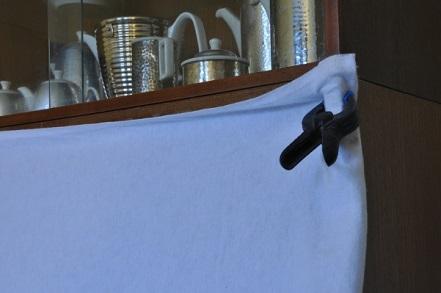
So, I bought a piece of white fabric on eBay, advertised as “photographic background”. It is a cotton cloth (in my case, 160cm x 250cm – about 5 x 8 feet), with “a texture that helps diffuminate shadows” according to the description. Any clean white sheet would have sufficed, though. To hold it in place, I took advantage of my furniture and some clamps.

A really practical solution would have been using one of those IKEA rolling blinds (the model “Isdans” or similar): no wrinkles, almost no texture, easy to store. You can also use white paper, but I found it difficult to find a sheet of paper big enough to serve as a background for a 120cm (4ft.) long bass.
Copyright © Photo by Dieter Stork
The benchmark: this professional picture of one of my instruments has the precise style I wanted to emulate. (Foto copyright: Dieter Stork)
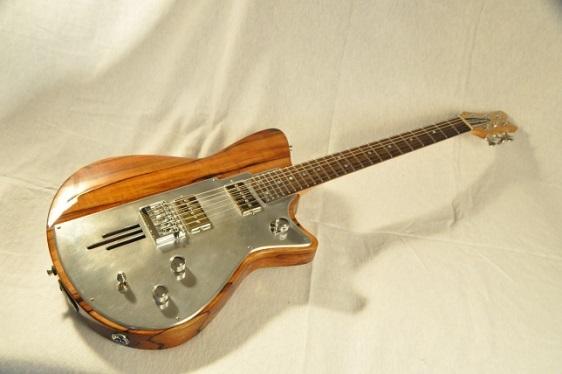
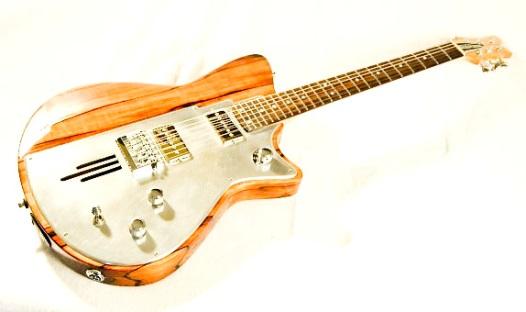
Also, paper tears easily. Another thing you could use as a background is a transparent sheet (made of plexiglas, or acrylic) resting on the cloth. That would eliminate shadows and will create a reflection instead, as if the instrument was leaning on a shiny surface (which it was: a big piece of 2mm thick acrylic sheet. It set me back 50 eur, though). That is what I tried to achieve in the picture above (which has of course been retouched — this also serves as a preview of the kind of result we are aiming at).
As explained earlier, the intention was to reproduce the style and quality of a picture taken by a real professional. In particular, I used a professional photograph of one of my basses as a benchmark (see picture of the black bass). That photo was taken by Dieter Stork, a recognized German photographer specialized in musical instruments. The quality of the picture I took is not quite as high as the professional one, but it is not a bad try for a newbie.
Lighting
Here we look at the most important part of the whole process. Despite my fundamental ignorance on the subject, I have come to understand that good photography is more about good lighting than about expensive equipment.
You have basically three options regarding lighting:
1) Natural light — which is not much use in product photography, such as in our case.
2) Off-camera flashes. This is a complicated technique. Firstly you need to synchronize the flashes via the use of remote controlled signals. You also need special settings on the camera and supports for the flashes. If you have them and know how to use them, go ahead, by all means. Certainly not my field of expertise.
3) Continuous lighting (lamps). This is the way I went. As the lights are continuously on, you can see a preview of the result on your camera’s screen and make adjustments before shooting.

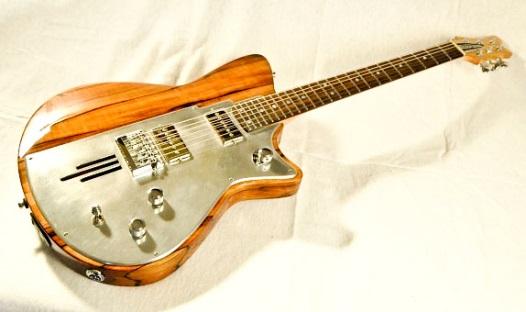
The result: eventually I obtained a picture like this one, which is maybe not as good as the professional one, but it is an acceptable first try. Note the deliberate refletions in the instrument face, obtained with a diffusor and a black piece of cloth.
I used two incandescent 500 watts lamps. You can get a similar lighting power from two 105W fluorescent bulbs. I didn’t have those at hand, but they are better than the incandescent bulbs for two reasons: lower consumption and lower temperature. They are more expensive, though. I got my two 500W lamps for 15eur each in a ‘Home Depot’ kind of store. Don’t forget to buy a few spare filaments for them (they burn or break fast, but are really cheap).
Remember, those incandescent 500w lamps will get HOT very quickly. Turn them on only when you are taking pictures. If you have to visit the bathroom or answer the phone, turn them off. I also got two white umbrellas with their supports and mounted them on lamp stands. I got them on eBay, for about 10 euro each. By using these umbrellas, the strong light coming from the lamps gets diffused, instead of acting as spotlights. This eliminates hard shadows and creates an ambience filled with a more distributed light and therefore softer shadows. The resulting, more uniform light, is distributed to all parts of the instrument.
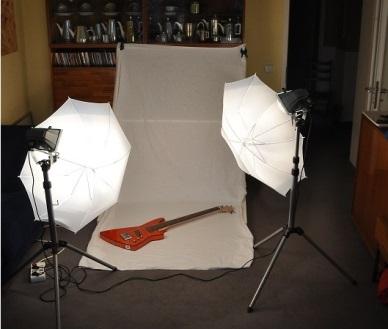
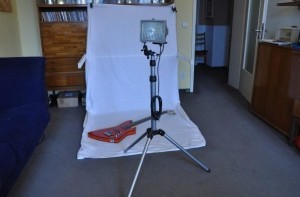
The next pictures show how my home studio looks at this point. Note how the light points directly at the umbrella. I did that by aligning the lamp angle (while the lamp is off and cold, of course) and the umbrella’s stick. The umbrella is held in position by the support that came with it, which is attached to the lamp support. There are different types of lamps and supports and you will have to use some ingenuity when setting everything up. Note that the power board is out of the way (down and to the left in both pictures): I could move the lights around and have easy access to the instrument without getting my feet wrapped up in cables. Both lamps are plugged into the same power board, which has an on/off switch (it makes easy to turn all lights on/off simultaneously).
I used cloth gloves to move the instrument around, in order to avoid leaving fingerprints on the guitar. To keep the instrument in position, I placed one of my dog’s plush toys under the body of the instrument — he was not happy about that, but it worked. A small cloth bag filled with rice would have also worked.
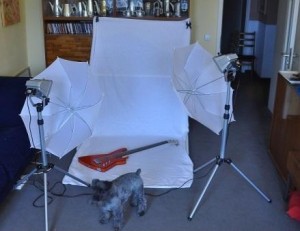
My basic home studio. Background, lights, and guitar are ready (my dog is making sure that everything has been set up properly).

Lights are on: let the shooting begin. Take your time, try different angles, move the lamps around.
So, my home studio was ready for the session. I wanted to take four or five pictures of each one of seven instruments. I decided not to do an instrument after instrument session — i.e. taking all pictures of one guitar or bass after another, but I went for a take after take session, instead. That means: I would place the lamps and the camera in position, and shoot the main picture for all seven instruments; then I would set up the lamps and camera for the headstock takes, and shoot all seven headstocks, and so on. That way I was not constantly repositioning the lights and the camera (trying to remember how they where, etc), but just the guitars.
So, that’s what makes a good home studio: simple, functional, cheap. And above everything else, safe.
Feedback and questions are welcome!
All the best,
V&R Team
Note: Photos copyright by Leonardo Lospennato
Please note that this article was published in Sustain Magazine #1 – visit http://www.FellowLuthiers.com